 Entrance
Chicken breast sous vide. Chicken legs sous-vide in a slow cooker
Today I cooked sous-vide chicken legs in a pressure cooker. Sous-vide technology is a way of cooking food in a vacuum. For those who hear about this technology for the first time, I will explain what the essence is. The prepared product is placed in a special bag, from which air is pumped out, and then hermetically sealed. Next comes cooking in water. The optimum water temperature is 63-64 degrees. Sometimes it can be lower or higher, but the water should not be lower than 55 and higher than 70 degrees. In this case, the temperature must remain constant.
Not only chicken, but also any bird is cooked using sous vide technology. As well as fish, pork, beef, lamb and even vegetables. I will not be able to describe and convey the taste to you. But once you try it, you want to try again and again. Although, in fairness, I’ll say that not everyone likes cooked in a vacuum. For example, my friend says: I'd rather traditionally fry, bake or stew. And then, as they say, the taste and color ...
Due to the fact that the REDMOND RMC-PM380 pressure cooker has a Vacuum mode, now I don’t have to look for detours, look for alternative modes. Cooking sous vide chicken at home is very easy. However, in multicookers that do not have a "Vacuum", but have a "Multipovar", you can easily cook sous-vide. What I did before REDMOND RMC-M170. However, I still cannot resolve the issue with the purchase of a vacuum sealer. Therefore, in the best option I use Zip-lock bags, at worst I buy already vacuumed products. The second option I call the worst only for the reason that I do not do it myself pre-treatment chicken (as in this recipe) or other meat, I don’t make the marinade myself.
Ingredients
- Chicken legs- 2 pcs.
- Marinade for chicken - to taste
- Water (for cooking in a slow cooker) - 1.5 liters
How to cook chicken sous vide in a pressure cooker
1. Prepare two chicken legs. As I already wrote, there is no vacuum sealer. Therefore, I bought the chicken already marinated and vacuum-sealed. If you do it yourself, then process the chicken pieces - do not remove the skin, but trim off the excess fat, wash thoroughly and dry with a paper towel. Prepare a marinade suitable for chicken, to your taste. Leave the chicken in this marinade for 4 hours (or more). Then remove from the marinade and pack in a vacuum bag. It is important to "bleed" all the air out of it. And it is better to place each leg in a separate bag.
2. Pour one and a half liters of fresh water into the multicooker bowl. We immerse the sealed legs. Close the lid, select the "Vacuum" mode in the menu. Since the mode is without pressure, the steam valve on the lid is left in the “open” position. Cooking time will be from 2 to 3 hours. If your chicken legs are not large and are “sealed” in separate packages, they will cook in two hours. For the same pieces, but in one package, the time is 2.5 hours. But large (both in weight and thickness) hams, and even in one package (like mine), turn on for 3 hours. That is, we are guided by the thickness of the piece - the thicker, the more time it takes for it to warm up. 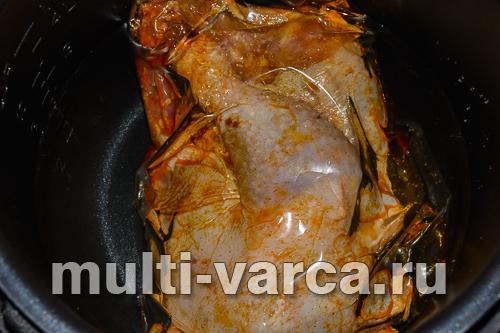
3. Immediately after cooking, cool in cold water. As they say, we do shock therapy. 
4. The next step is optional. To give the legs a "noble" look. We open the package, take out the pieces and dry them (we get wet with a paper towel). Pour a little vegetable oil into the multi-bowl, turn on "Frying / Deep Frying". After warming up, the appliance will beep. Place the chicken in the bowl and fry for a few minutes on each side. 
5. Ready sous-vide chicken legs are served to the table. For a side dish, you can cook what you are used to serving with chicken. And for light dinner limit yourself fresh vegetables. Enjoy your meal! 
Finally got around to writing about one of my favorite kitchen appliances (the Kitchen Aid planetary mixer is unbeatable :-)), a sous vide cooking appliance, a water bath with a controlled and constantly maintained temperature . To be completely accurate, then for cooking using this new technology, two devices are needed, one of them is a water bath, the other is a device for vacuum packaging products, since food is cooked vacuum-packed at relatively low temperatures. As a result, the product, in fact, any, is much juicier, it is cooked evenly, and besides, you do not have to constantly stand at the stove.
From my experience, I can safely say that meat and fish are incredibly tender cooked in this way! And the toughest and hardest products turn into an incredibly tender treat full of taste and aroma!

2 servings:
Ingredients
- 2 chicken breasts, preferably with skin
- Vegetable oil for frying
For marinade:
- Zest and juice of 1 lime
- 1 tsp paprika
- 1 tsp salt (or more, to taste)
- 1 tsp ground cumin
- 1/2 tsp cayenne pepper
- 3 tbsp vegetable oil
1) Place the chicken breasts in a deep bowl, add all the ingredients for the marinade.

Mix.

2) Breasts, without washing off the marinade, vacuum pack in special heat-resistant plastic bags, one in each. Leave for 30 minutes at room temperature.

3) water bath for sous vide, heat up to 64 ᵒС. Lower the breasts and cook for 2 hours.

4) Remove the breasts from the water bath after the specified time has elapsed. Remove the breasts from the bags, pat dry with paper towels.

5) In a large frying pan, over high heat, heat well vegetable oil. Place the breasts in the hot skillet, skin side down. Quickly fry the breasts on all sides, until golden brown.
I continue to report on my experiments in sous vide technology - low-temperature cooking of almost any product in a vacuum.
I don’t have a special machine with a thermostat and a vacuum cleaner, I adapted a regular wide-mouth thermos for this technology.
Last time I showed in this thermos. A piece of salmon weighing 300 grams was cooked in just 15 minutes, but the fish had time to fully cook and turned out incredibly juicy, tender and tasty.
Only chicken fillet can compete with fish in terms of tenderness and speed of cooking.
Today I will show you a mini-report. By the way, in fact, it turned out that the chicken cooked faster than the fish, but everything is in order.
For sous-vide chicken, I took 450 grams of skinless and boneless chicken fillet (2 halves).
I made deep oblique cuts all over the fillet (so that the meat marinated better), and then rubbed it with a mixture of chopped garlic, grated ginger, pink pepper, chili pepper, added a pinch of cumin, a few drops of lemon juice and olive oil and 1 teaspoon of salt.
I put the fillet in a container and put it in the refrigerator for the night.
The next morning, I took the container with the fillet out of the refrigerator, and while I was boiling water in the kettle, while I was looking for foil, the breast already had a temperature of 15 degrees Celsius.
I wrapped the fillet in a single-layer foil bag, wrapping the edges very carefully and squeezing out the air from the inside as much as possible.
By the way, have you noticed that modern foil has different sides? On the one hand, it is mirror-like, shiny, and on the other, it is matte, and this is no coincidence. The side depends on how we want to use the foil: the shiny side reflects infrared rays better, while the matte side lets them through.
For example, you have a chicken in the oven. She would still bake and get dirty (still raw inside), and the skin on top begins to burn. We cover the chicken with foil - matte side to the bird, shiny to the heating element.
Or vice versa, there is a pie in the oven and everything is not baked on top. We change the sides of the foil - matte to the heating element (infrared rays will pass freely through the foil), and glossy to the cake (the heat coming from the cake will be reflected from the shiny side and return back to baking) - the dish will be ready much faster!
In this recipe, I chose the matte side of the foil for contact with water (so that the heat passes unhindered into the bag), and the shiny side is pressed against the chicken - the heat will be reflected and go back.
Next, I put the bundle with the fillet in a thermos and poured boiling water over it. Since the fillet was not straight out of the refrigerator and not very cold, the temperature of the water did not immediately drop too much. The thermal imager showed 95 degrees Celsius.
Then I tightly closed the thermos with a lid and left it for 10 minutes. Yes, yes, yes, only ten!
The control measurement of water after the expiration of time showed 70 degrees Celsius.
Of course, the first time I doubted sooooooo much - was the chicken cooked in such a short time? Of course, a night of pickling, garlic and lemon juice did their job, but 10 minutes of heat treatment - somehow I don’t really believe in the readiness of the product, although in appearance a piece of fillet looks absolutely ready.
And the temperature inside is quite normal - 52 degrees.
But as it turned out, I was worried for nothing. The chicken fillet managed to fully cook in such a short period of time - the protein was completely denatured (curled), but the meat remained tender and juicy. Knife cut like butter! The color is uniform pink-gray both inside and out, no blood, cloudy juice and other signs of raw meat.
Of course, all the fillets immediately disappeared from the plate, and I rushed to marinate a new portion, and then in the evening I did a trick: I showed the Hare a piece raw chicken, wrapped it in foil, dipped it in a thermos with boiling water for 10 minutes, and then let it be tried with closed eyes))) The man believed me only when he wrapped it himself, put it himself, he guarded the thermos for 10 minutes, and then he unfolded it himself and took a sample. It turned out, no magic and no magic! Well, then we had plenty of fun, entertaining our friends in this way of cooking chicken fillet))
The main plus of the recipe is that you don’t need complex machines: thermostats, thermometers, vacuum pumps - just a thermos with a wide neck and a little time!
Enjoy!
Under the following experiments fell chicken eggs And now I know how to cook!
Chicken breast cooked using sous-vide technology in a slow cooker is incredibly tender and juicy. Its taste shade will directly depend on the spices and spices used - the main thing is not to overdo it with them. If desired, chicken fillet can be marinated in advance, spread with spices and left for a couple of hours in a cool place. Although, even without preliminary preparation, the breast will turn out delicious. Ready meat can be served with a salad or side dish, as well as used as an ingredient for the same salad or appetizer.
Ingredients
- 1 chicken breast;
- 2/3 tsp salt;
- 1/5 tsp spices;
- 1/5 tsp dried thyme;
- 2 slices of lemon.
Cooking
1. If it is the chicken breast that is available, then it should be cut - separate the fillet from the frame. Or you can buy a ready-made fillet. Wash the meat and cut off all unnecessary - pieces of fat, films. 
2. Sprinkle the chicken fillet on all sides with salt and spices, as well as dried herbs. The recipe uses ground coriander and dried thyme, which goes great with chicken. 
3. Squeeze a couple of lemon slices on top of the chicken. You can, if possible, let the fillet stand in lemon juice for 20-30 minutes. 
4. You can use special bags with zippers to cook the sous-vide breast, or you can get by with ordinary food bags. Arrange the fillets in bags with lemon slices and also distribute the lemon juice. Release the air and tie (zip) the bags. 
5. Place the prepared fillet in the multicooker bowl. Add water so that the meat is completely in the water. Close the lid and set the temperature to 70 degrees, the "Multipovar" mode. Boil 40 minutes. 
6. After the beep, remove the fillets and carefully remove them from the bags. 
It's no secret that chicken breast is easy to dry out when cooking, it will be tough and not very tasty. The method I propose greatly improves the taste and texture of this meat. The essence of technology is "sous-view" at home. To do this, we need a slow cooker and zip-lock bags, which can be bought at hardware or specialized stores. Of course, you can get by with simple bags, but with such a fastener it is much more convenient. Be sure to check the bags for leaks, we do not need water to get into it.
According to the sous-vide technology, the product is cooked in water at low temperatures (usually not higher than 70 degrees) in special bags from which the air is pumped out. Due to the lack of air, the meat is quickly saturated with the aromas of spices and seasonings.
In a slow cooker, sous-vide chicken breast is juicy, soft and very tender. This is an excellent substitute for ham or sausage, you can make salads and different snacks. Delicious both warm and chilled. And you can freeze for future use right in the package.
We will prepare the products according to the specified list.

Wash chicken breast well, pat dry and season with salt and pepper. Let's stand for at least half an hour. You can leave it overnight in the refrigerator and cook it in the morning.

Additionally, you can flavor the breast with garlic, poultry seasoning or other spices. You can put pieces of chili for spiciness, butter or vegetable oil.

I seasoned one fillet with coriander, left the second with salt and black pepper, and added chopped garlic to the third.

Now you need to squeeze as much air out of the bag as possible. You can lower it into a container of water, the water will squeeze out the air and all that remains is to close the bag. And you can suck the air with a straw for cocktails. To do this, leave 2-3 centimeters uncovered in the bag, insert a tube and inhale air into yourself. If the result suits, then quickly close the package. Of course, this will work if the packages are small.

Pour into the multicooker warm water and drop the packets with chicken fillet(so that the meat does not lie on the bottom, but is covered with water).

We transfer the multicooker to manual mode. We set the cooking temperature to 70 degrees.

Set the cooking time to 1 hour.

After the time has elapsed, remove the sous-vide chicken breast bags from the slow cooker. Let cool, cut into slices and serve. Enjoy your meal!

