 Entrance
What to make moonshine at home. The process of making a moonshine still from improvised means
A moonshine still is, in the days of the Prohibition, the only thing that saved people before holding any events: birthdays, weddings, and so on.
AT Soviet time home brewing was considered a criminal offense. After all, this alcohol, unlike vodka, is environmentally friendly. Brazhka for him insists on yeast, sugar, wheat or beets. And to add flavor, you can use various additives: prunes, herbs, mint, oak chips, birch buds and other components. Therefore, craftsmen did at home alcohol mashine from improvised materials.
One of the most popular and simple options- These are designs from a milk can. Moreover, an aluminum can cannot be used, since this material reacts with all chemical elements. And the moonshine of the first cleaning contains a large number of harmful impurities: fusel oils, acetone and others. That is, with intensive use, after some time, the aluminum can will turn into a colander.
How to make moonshine?
- First you need the can itself. If you can find it in stainless steel, it will be just fine. Volume - not less than 30 liters
- Next, you need a coil. The coil is needed to improve heat transfer between the two media. It is practically the main part of the design. Even in Soviet times, when the police were looking for "moonshiners" it was he who was confiscated. For the coil, it is better to take a copper tube with a diameter of about 12 mm. In order to bend it at home, you can use the wooden handle of a mop or shovel. If there is nothing suitable, then just take a piece of pipe, fill it tightly with sand or soda, tamp and wind several turns around the pipe. Carefully remove the coils and cut the pipe. Moreover, it is necessary to leave even pieces of pipe at the top and bottom
- Then the twisted part of the coil must be placed inside the pipe (for example, it can be cut off from the sewer of a suitable diameter), departing from the twisted part three centimeters on each side

- After that, to the same pipe (it will play the role of a refrigerator), from the outside we attach adapters for driving and draining cold and heated water, respectively. It is advisable to imagine in advance where the water at home will be connected, and make an adapter in this direction. For sealing, you can use the test. Drying, it will tightly close the smallest holes and prevent the precious liquid from seeping out.
- The next step is to close the upper and lower holes of the sewer pipe section with plugs. They can be cut from tin, copper or other material. In the center of them, pre-make holes for the ends of the coil. Seal all joints tightly using the same paste.
- If a metal pipe (refrigerator) is used instead of a plastic pipe, then end caps can be welded to it, and poured on top with a mixture of epoxy and silver. Epoxy, by itself, is quite fragile, so it must be mixed with another component in order to get protection “for centuries”
- You can connect the refrigerator with a dryer. This is optional, but desirable to improve the quality of moonshine. Since getting into it, fusel oils cool down and, having lost their boiling point, remain in the steamer in the form of sediment
We make a steamer
- In order to assemble it at home, you need a glass jar with a tightly screwed lid.
- It is necessary to cut two holes in it: one of which will include the end of the pipe from the can, and from the other - go into the refrigerator
- To do this, according to the diameter of the adapters (fittings), draw circles on the cover, carefully cut them out, install the adapters and tighten the nuts tightly

- For reliability, the joints can be treated with varnish or the same raw dough
- The last step is to close the jar with a lid and also seal the joint
- Then, we tightly seal the lid on the can and cut a tube into it to connect to the steamer, and it, in turn, must be connected to the refrigerator
Do not install the refrigerator either horizontally or vertically. The optimal angle of inclination is no more than 40 degrees.
Putting all the details together
The next step. It is necessary to connect two hoses to the makeshift refrigerator to drive and drain water. You can connect the cold water pipe directly to the faucet, or you can crash into the system by installing a tee on the pipe. The hot water outlet hose at home can simply be lowered into the sink.
Before using the device for the first time, it is worth checking the entire system and boiling clean water for several hours. In order to make a moonshine still of this design at home, neither a diagram nor drawings will be needed.

You can make an electric moonshine still at home. In this case, you will already need drawings and a diagram and a preliminary calculation of the energy consumed and the power of the heaters that are installed in the distillation tank.
In addition to full-fledged designs, there are options for a mini-device. For example, from the usual tin can from a cola or a cocktail and the usual three-liter. In addition, there are gift options for mini-designs of this type. Having presented such a mini-device, one can then proudly say that they presented a mini-factory for the production of alcohol as a gift.
Moonshine from improvised means
And the simplest apparatus for home brewing is an ordinary saucepan, at the bottom of which is water.
- A stand for a container is installed at its bottom, and such a structure is closed with a basin of a suitable diameter. The edges are sealed with dough or clay for tightness.
- The pot with the mash is put on fire, the mash gradually evaporates, cools from the basin-lid and drips into the container
- Here, the main thing is to correctly calculate the volume of the product. From about 4 liters of mash, you get a liter of finished product

Therefore, if you are not satisfied with the quality of purchased alcohol, then you can proceed to decisive action and surprise your friends with home-made moonshine.
How to make a moonshine still at home? You can assemble the device using improvised means, and it is not necessary to purchase expensive equipment or materials. You can make a distiller if you have certain skills in design, ingenuity and the desire to create devices with your own hands will help in this.
At the same time, a do-it-yourself device is enough to produce moonshine of good quality from mash. Such a product will be quite suitable for use. If everything is done correctly, then there will be no fuselage in it, the taste of the drink will be pleasant, without bitterness, and the absence of smell will complement the overall impression of the evening spent.
A home-made moonshine still can be assembled literally “on the knee”, without using complex drawings and without making blanks. As a base, you can use an ordinary bucket that is in the kitchen.
Self-made moonshine
Braga is poured into the bucket, a container will float on the surface of the liquid, you can use a metal bowl or any other container. From above, the basin is covered with a large container and they begin to heat the mash over a fire.
The quality of such alcohol can hardly be called even satisfactory. The fact is that such moonshine will contain fusel oils, as well as other harmful substances. Drinking such a drink is dangerous to health, since it can cause severe intoxication (poisoning of the whole body, brain damage).
If such a moonshine still does not inspire confidence, then it is worth starting to manufacture a better device.
The classic system contains the following modules:
- distillation cube (a container in which the mash will boil and gradually turn into alcohol);
- dry steamer (can act as an additional module, its presence can significantly improve the quality of the product);
- cooling system, which consists of a coil and a reservoir (necessary for alcohol vapor to turn into condensate);
- container for receiving the finished product.
You will also need a few silicone or rubber hoses and materials to seal the structure. You can use glue, sealant or even dough.
Distillation cube: structural features
Homemade moonshine still can be made from a saucepan or a can, any container of an acceptable volume will do, but on condition that it is made of stainless steel. You can also use copper - this metal conducts heat well, but its cost is quite high. But aluminum, which was popular 20 years ago, comes into contact with alcohols and aggressive substances. The oxidation process is slow, but over the years, metal ions will get into the mash, they will spoil the taste of the drink.
You can make a cube from a keg or flask, as long as the container has an airtight lid. If the amount of alcohol consumed is minimal, then you can make an alembic from a pressure cooker, but it is unlikely that you will be able to process more than seven liters of mash at a time.
There should be a valve at the bottom of the cube, it will help remove the remains of the mash from the tank. The distillation cube is connected to a dry steamer and a cooling system, this is done using silicone hoses.
The main thing to pay attention to is the tightness of the structure. The lid should fit snugly on the container - this will avoid steam leakage. You can fix the lid with sealant or glue using food grade silicone gaskets.
A fitting is screwed into the lid of the distillation cube, it is advisable to equip the container with a thermometer - this will help control the distillation process.
After the thermometers are mounted in the container, and the distillation cube is ready for use, it is worth starting the manufacture of the cooling system.
Coil and refrigerator
You can assemble a moonshine from improvised means, but you still have to purchase some parts. As a coil - the main part of the refrigerator - it is worth using a copper pipe with a diameter of 8 to 12 mm. The length of the coil is from 1300 to 1500 mm.
The pipe will have to be twisted into a spiral, and then placed in a tank. As a reservoir, you can use a piece from a sewer pipe.
The coil is needed in order for alcohol vapor to move through it, and the water that enters the tank from a water pipe or a special container turns the steam into condensate. Simply put, water cools alcohol vapor, turns them into ready moonshine free from harmful elements.
The reservoir for the coil must be spacious. I would also like to note that copper is considered the main material for the coil, but many lovers of making alcohol at home say that copper is toxic. In fact, this metal cannot lead to poisoning, it does not oxidize upon contact with alcohols and conducts heat well, unlike aluminum. If it was not possible to get a pipe from copper, then it can be replaced with a stainless steel.
The manufacture of a moonshine still with a cooling system has some nuances - the device can be connected to the water supply. If there is no water supply, then you can make a device with a container in which water will be located.
The coil is installed in the tank, and then fixed on both sides with plugs. The structure is treated using glue or sealant, and then attached to the distillation cube using hoses.
Sukhoparnik (reflux condenser)
A moonshine still with a sukhoparnik is a device that allows you to remove fusel oils from alcohol, make a drink of high quality and taste good.
What can a dephlegmator be made of:
- From a glass jar with a volume of 0.5 liters and a tight stainless steel lid.
- Of 2 fittings and 2 nuts, as well as 2 silicone tubes.
Two marks are made on the lid, the fittings are circled in diameter with a marker, and then, using an awl, two holes are made in the lid.
Fittings are placed in the holes, they are fixed with nuts, then the cover is screwed on, and the holes are treated with sealant or glue.
With the help of silicone hoses, the device is attached to the distillation cube and refrigerator. The reflux condenser will collect harmful oils, it acts as a kind of sump. Often the device is filled with water, after the distillation of moonshine is completed, it becomes brown.
Making a moonshine still with a steamer is not as easy as it seems. Make sure the lid fits snugly on the fixture. But at the same time, it must be removable - this will make it possible to remove the oils accumulated in it from the steamer.
You can make two reflux condensers for one distiller, one of them should be used as a sump for fusel oil, and flavors of natural origin should be added to the other. Lemon peels, spices and herbs will do - they will give the drink a pleasant smell.
If the refrigerator is connected to the water supply, then you can equip the steamer with two hoses. One of them is lowered into the sink, the fuselage will flow down the hose.
A few nuances
There are several tricks that will help you make your own distillate machine.
- When choosing a pipe for a coil, you should pay attention to the thickness of its walls, this figure should not exceed 1.1 mm.
- The coil can be positioned different ways, but it is better if the entire cooling system is located vertically. In this case, the steam must flow to the top of the coil in order to minimize production costs.
- The coil can be cooled not only with water. You can equip the system with a fan or a cooler from a computer. But such a design for cooling is not as effective as one that involves plumbing.
- If the cooling system is equipped with a reservoir of water, then during the distillation process it will be necessary to periodically drain the liquid, adding a new one to the reservoir.
- A flow-through cooling system is more complex, which is why distillers with no experience with a distiller prefer those systems that are equipped with a non-flow cooler.
- If the cooling system is done correctly, then moonshine comes out of it during distillation room temperature, it can be cold. But warm or hot alcohol is a sign of insufficient cooling or a malfunction in the refrigerator.
- To make even turns on the coil, you should first fill the tube with sand, soda or pour water into it, and then freeze it. After that, it is necessary to wind the pipe onto the workpiece. When the coil is ready, sand or soda is poured out.
- The number of turns in the coil is of no fundamental importance, the main thing is that the distance between them does not exceed 12 mm. Devices from Germany have a coil with 5 turns; for Russia, a coil with 6–8 turns is considered the standard.
Do-it-yourself moonshine still is not so easy to make. To have an idea of where to connect the hoses and how to mount the parts of the device to each other, it is worth looking at the drawings. A visual explanation will help to understand and understand the process of creating the device.
If there are no certain skills in design, but there is a great desire, you should first familiarize yourself with the process of creating the apparatus, watch the video, collect information, and only then purchase the material.
Hi all!
Today I will tell you how to make a refrigerator for moonshine with your own hands. Finally, I sat down to write this article. He promised everything, promised to write it, but constantly put it off. And yet, I did it.
Most of the article is devoted to the straight-through refrigerator, because I use it and I think it is more progressive or something. Why? Read below. I will also tell you about how to make a coil for a moonshine still, but more briefly.
The refrigerator of my design is assembled in about an hour. The cost of parts will be about 650 rubles.
If you don’t want to work with your hands, then you can immediately buy an inexpensive and good refrigerator here here.
Varieties of refrigerators
In total, there are two types of refrigerators for moonshine - direct-flow and coil. No, of course, our hobby with you implies a vast field for creativity, and for sure craftsmen have already made a great variety of refrigerators of various designs and shapes.
But we will consider only the classic options.
So, a direct-flow refrigerator is a straight tube made of copper or stainless steel, on which a casing is put on top (for example, another pipe). Moonshine goes through the inner tube, and coolant (water) goes through the outer tube. The scheme of such a refrigerator is shown below.

The coil is the same tube, only twisted into a spiral, which is placed in a housing with cooling water. Coil circuit:

Detailed drawings and fabrication instructions are provided in the following sections.
Yes, I almost forgot. Is there some more glass refrigerator, which can be purchased at lab supply stores. But I do not recommend using it, because. this very fragile device tends to break at any good opportunity.
This is especially dangerous during distillation, because the vapors and condensate of moonshine are flammable substances!
Which is better, a coil or a straight-through
As I said at the beginning of the article, I use a direct-flow refrigerator. I can highlight the following advantages:
- It does not form condensate plugs, which lead to pressure fluctuations in the distillation cube. Pressure drops lead to a sharp boiling of the mash and its release into the refrigerator (spray entrainment). When using a coil, this phenomenon occurs quite often, but in a straight-through it is excluded.
- In a direct-flow refrigerator, it is easy to regulate the temperature of the selection of moonshine. It instantly responds to changes in the water supply. In the coil, the reaction is very slow.
- Its efficiency is higher. Consequently, water consumption and costs are lower.
Of the advantages of the coil, I can only name:
- More compact dimensions (not always).
- With a certain design, running water can be dispensed with.
Direct-flow refrigerator manufacturing instructions
I considered many different designs and settled on the option of a polypropylene pipe and fittings. This is one of the cheapest materials that you can buy at almost any plumbing store or hardware store.
My total costs amounted to 678 rubles in one case (option No. 1) and 610 rubles in the other (option No. 2).
The very idea of using a polypropylene pipe does not belong to me, but I came up with the design and technological solutions proposed here and have already repeatedly tested it. I offer two options for execution, which are easy to do yourself.
For manufacturing, we do not need special tools, and all the work will take no more than an hour.
- Option number 1
So I used:

I collected all this according to the drawing below. Looking ahead, I will immediately show you a photo of what happened.

Step-by-step instruction

Update from 14.09.16. After about 10 distillations, the straight-through began to skip in one place. Apparently the glue dried up and a gap appeared. As a result, I filled all the cracks with sealant for the aquarium, which remained after manufacture moonshine from a pressure cooker. Several times already successfully tested in combat conditions.

Update from 11/15/2019
The finalization of the design of the cooler was proposed by a blog reader Evgeny. Below is its text:
I assembled mine from a stainless tube with a diameter of 10mm and a wall thickness of 1mm.
The problem for me was the sealing of the end exits. None of the investigated sealants work with the polypropylene from which the refrigerator jacket is made. It took literally 1-1.5 times.
Then I bought a stainless steel collet with a ½ male thread and a socket with a ½ female thread. And it's been over a year now with nothing!
I also wanted to say that when using a tube with an outer diameter of 10mm and a PVC pipe as a shirt with a diameter of 20mm, a cork can result in the passage of water in the places where the pipe and tees are soldered.
When soldering these elements on the inside, a kind of influx is obtained, which tightly fits the tube and prevents the passage of water. At least that's what happened in my first fridge. I had to take PVC pipes and stuff with a diameter of 25mm.

Option number 2
This option differs in that I used a copper pipe with a diameter of 10 mm and a polypropylene pipe with a diameter of 20 mm. In this case, transitional couplings are excluded from the design, and the plugs are inserted directly into the tees. Photo below:

Due to this and the smaller diameters of the tubes, the straight-through is a little cheaper and lighter, but its throughput is also reduced. See the next section for recommendations on steam wand size and other sizes.
- I came to the conclusion that the following dimensions are the most optimal - the length of the water jacket (casing) is 50-60 cm, the one-sided gap between the tubes is 1-1.5 mm. In my first variant, such a ratio is not maintained, but then I have not yet drawn definite conclusions.
- When selecting, pay attention to the wall thickness of the polypropylene pipe in order to withstand the required clearance. For example, a pipe Ø20 mm has a wall of 3.4 mm and an inner diameter of 13.2 mm. And for Ø25 mm, the wall is 4.2 mm and the inner Ø16.6 mm.
- The thinner the wall of the copper pipe, the better the heat is removed from the steam. It is better to use tubes with a wall thickness of no more than 1 mm.
- Cooling water must move towards the steam, so its supply must be connected on the opposite side from the steam inlet. As shown in the diagram at the beginning of the article.
- The normal operating position of a once-through refrigerator is a vertical position, in which the condensed moonshine flows freely down. This ensures its maximum efficiency and eliminates the formation of condensate plugs.
- The copper tube after each distillation must be cleaned with a brush. Or at least flush hot water. Otherwise, poisonous copper sulfate is formed.
Instructions for making a coil
The main stages in the manufacture of the coil are as follows:
- A tube made of copper or stainless steel with a diameter of 10-12 mm is taken. Length from 1.2 to 1.5 meters. Wall thickness 0.8-1.0 mm. Less than 0.8 is easy to damage during manufacture. More than 1 mm is very difficult to bend and their thermal conductivity also deteriorates.
Copper tubes in stores are sold annealed and not annealed. An unannealed tube cannot be bent, so it does not suit us.


That's all. This is where I end. Perhaps I will still finalize the design of the refrigerator, there are some ideas. Sign up for updates and I will keep you posted on any changes. If you have questions - ask in the comments. Also wondering what kind of refrigerator do you use? Did you make it yourself or buy it?
All for now. Dorofeev Pavel.
Despite the huge selection of moonshine stills, many still make it with their own hands. This is done for the purpose improving the quality of the distiller and saving money as some parts may already be in the household. We will show you several ways that you can go to make a complete moonshine distiller. We will consider the most quick, most cheap and most qualitative option.
It is not always profitable to manufacture all parts of the apparatus independently. You can buy something, but somewhere it is better to save. We will show you the most profitable options, and you will already choose the most suitable for you.
I suggest that you immediately make a moonshine with, so that you get a cleaner and better drink. By the way, it is the steamer that is the part that is much more profitable to do on your own, and not buy in a store.
What a classic and high-quality distiller for moonshine consists of:

- Alembic (tank). This is a container from 5 to 100 liters in which the mash is heated. It is best to make it from stainless steel or copper. Enamelled steel is also suitable, but it is less preferred. Food grade aluminum only as a last resort.
- Steam pipeline. These are tubes through which alcohol vapors move. They can be made from stainless steel or silicone. The main thing is that they are as tight as possible and do not absorb odors.
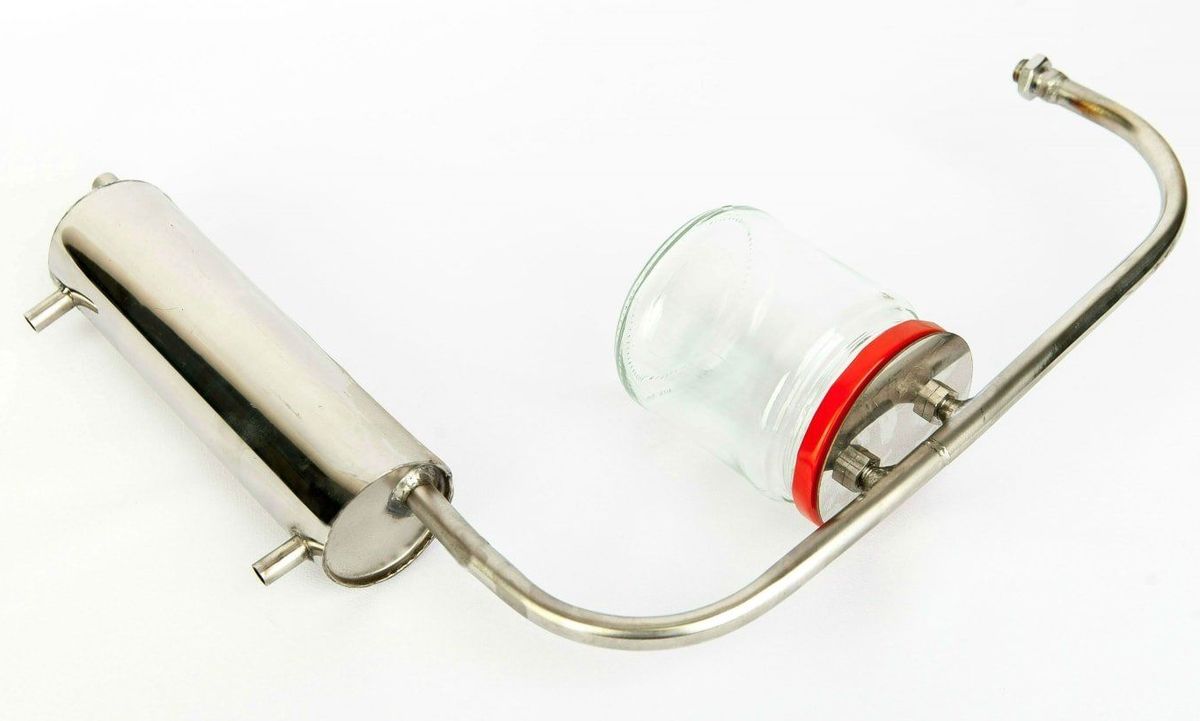
- Sukhoparnik. A device for cleaning moonshine from harmful impurities. It is highly recommended in moonshine stills, as there is definitely an effect from it. Most often made of stainless steel, but we will use the usual glass jar not large volume. .
- Fridge. The most complex part in the design of the distiller, which helps to cool the alcohol vapors and condense them into moonshine. There are several ways to make it yourself, although it is also on sale.

The fastest option #1
Photo of the finished moonshine still from the pan
The distillation cube is a conventional one made of stainless steel or enameled steel. The steamer and cooler are purchased separately and are simply inserted into a pre-drilled threaded hole.
You can make such a unit in 10 minutes, and the total cost will be about 2500 rubles.

The finished apparatus from the pan.
We turn the pan into a moonshine
Just cutting a hole in the lid and inserting a steam pipe into it will not work, you need to make the pan airtight and tight. Only after that you can connect the refrigerator and dryer.
We perform the following actions:
A coil with a dry steamer costs around 2.5 thousand rubles.
- We buy a meter of silicone hose, cut it lengthwise and pull on the top diameter of the pan. This will be a homemade gasket that will keep the container tight.
- We drill a hole in the lid for the steam line with the steamer and refrigerator. You will most likely need a 12mm drill bit.
- We insert the adapter into the pan, fix it inside with a nut with a gasket, and outside we fix our steam pipe.
- For maximum pressure on the lid, use paper clips: over the entire diameter, clamp the lid and pan 6–8 times.
- The distiller is ready for distillation.
Try not to accelerate the wash to maximum temperatures so that it does not begin to seep through the silicone gasket. Produce heating gradually.
Video instructions for making
Better to see once than hear a hundred times. Sixteen minutes author of Youtube channel Spy Gates tells and shows what actions and what tool you need to perform in order to make an apparatus with your own hands.
This is quite a budget and a good option for all beginner moonshiners who care about speed.
The cheapest option #2
Photo of the finished apparatus from a milk flask (can)
Finding now is not a problem. There are quite a lot of them left from Soviet times, and even on Avito or Julia you can easily find a suitable option.
A flask makes a really good alembic of decent size, which is suitable for distilling a large volume of mash. It is not so difficult to process it into a moonshine still, because the principle remains the same as with the pan.

A possible implementation of a moonshine still from a flask.
How to convert a can into a moonshine still

- Using a 20 mm drill bit, we make a hole in the lid of the can.
- We insert a brass fitting into it, which is tightly clamped on the inside with a nut with a gasket.
- If you plan to monitor the temperature, then you can make another hole under.
- We put a stainless steel gas hose on the fitting, which we connect to the steamer.
- , read the detailed instructions at the link provided or further look at a separate video.
- From the steamer we move the hose to the refrigerator, which can be made flow-through or conventional. The first option is more efficient and complex, and for the second, you just need a large container of water (bucket).
- We tighten all the nuts and start driving moonshine!
For moonshine, it is best to use. But brass is also not the worst option, so nuts made of this material are not a problem.
Making a distiller from a can on video
One of the most detailed videos from Youtube channel Overcraft collected almost 250 thousand views. The author shows all his actions on the video and makes tooltips that describe the diameters and names of the necessary equipment.
The video is short but enough to understand. general principles processing cans into moonshine.
We make a dryer with our own hands
As a bonus, we post a video from Antonych and Alexey Podolyak, where the author makes a steamer from an ordinary can. According to this principle, you can even make (filtration goes through water), if for you it seems to be a more useful and effective device for cleaning alcohol vapors.
We believe that any classic distiller should have 1 dry steamer or 1 bubbler. Combining them or doing several at once does not make practical sense. Only wash excess equipment and increase the loss of alcohol.
Best quality option #3
Photo of the finished apparatus from a beer keg
The coolest device is made from . They require serious improvement and processing, but the result is at the level of high-quality and expensive distillers.
The most popular container is 30 liters, equipped. This installation allows you to distill the mash in any room and place where there is an outlet with electricity (even on the street).

A beer keg converted into a moonshine still. In parsing.
The process of converting a beer keg into a moonshine still
The work is difficult and requires the skills of owning a welding machine, grinder and screwdriver. The sequence of actions is as follows:

- The hole expands from above under the steam line of the moonshine still. An ordinary gas hose will not work here; a wide stainless steel pipe with maximum tightness is required.
- A 2-inch hole is drilled from below for the clamp to be soldered. In the future, a heating element will be inserted into it, which heats the mash.
- For convenience, a tap for draining stillage is cut into the keg, the bottom is equipped with legs for stability, and handles are cut out from above.
- A thermometer can be added to the design, which is inserted in the same way as a saucepan and a can.
- Let's start the race!
The whole operation takes several days of work, since in addition to converting the keg into a distillation still, a dry steamer and a refrigerator are also needed.
Video instruction for converting a keg into a moonshine still
Made a great series of videos Andrey Golubenko. Slowly, at home, by connecting small children to work, the author slowly improves the design and eventually makes a fantastic distiller that does an excellent job of distilling any kind of mash.
The process is divided into several parts, in each of which the author makes one of the parts of the apparatus design. Highly recommended for viewing to all moonshiners for experience.
How to embed a heating element in a distillation cube
A rather delicate task that can be solved in two ways: by welding or without her.
In the first case, a hole is simply drilled and a clamp is welded into which the heating element will be screwed in in the future. the whole process is clearly shown in the video from the guys steel jet. The process is long, but thorough.
In the second case, it is necessary to purchase an o-ring and special ring from online store moonshine-and-vodka.rf. This is a fairly innovative method that no one has used before.
The guys did a lot of testing and launched a unique product on the market that solves a serious problem for moonshiners: to the tubs periodically broke from welding. Using the ring allows you to simply screw the heating element into the hole without unnecessary welding.
Other options for making moonshine with your own hands
pressure cooker
The Soviet pan has perfect tightness, but an extremely small volume. Having filled 75% of this capacity, we will end up with a maximum of 1 liter of 40-degree moonshine, and in any case, we will have to distill it twice to clear it of harmful impurities.

The appearance of the finished distiller from the pressure cooker.
It’s not worth taking this option seriously, but for a change, you can try to overtake the alcohol-containing liquid in and look at the result. Just try to clean the product from fusel oil as much as possible.
As an alternative to stainless steel tubes, you can use food grade silicone. It is securely fitted with clamps and does not miss anything.
Multicooker
One of the most absurd ideas a moonshiner could come up with. it has excellent tightness and it already has a valve for steam outlet. It remains only to insert the steam line hose there and you can distill the mash into moonshine.

A working moonshine still from a multicooker with 4 bubblers.
The video shows the distillation of wine and the remaining beer from the refrigerator. A few bubblers gurgle pretty cool, although this amount is not necessary, they look spectacular.
As one of the users on Youtube rightly noted in the comments, the result was not ordinary moonshine, but a real hour! 🙂
Bucket
Finally the most crazy idea, is to drive moonshine directly from a metal bucket. Tighten the tightness with conventional stops, drill a hole for the tubes and go ahead. Perhaps this is the cheapest moonshine still, which even surpassed a milk flask. 🙂

Distillation of moonshine in a bucket.
It is best to use an enameled container, which will not react with mash at high temperatures. Ordinary metal is not suitable for this, so take classic 12-liter buckets with enamel.
A bucket for 800 rubles will cost you much cheaper than a stainless steel distillation cube for 5-6 thousand.
Brief conclusions
As you already understood, making a moonshine is not so difficult. The distillation process is not that complicated and modern distillers with high prices just made it easier. And cleaner. Homemade distillers cannot boast of high-quality alcohol vapor purification, although homemade sukhoparnik, and solves this problem.
you carefully enough watch instructional videos and make no mistake with the diameter of the holes that you will need to drill or weld. You can leave any questions in the comments below the video. Some of the authors share their experience with users almost daily.
Good luck with your work and high-quality moonshine after distillation!
Sooner or later, everyone who has ever tried homemade moonshine(or its variations - cognac, bourbon, liqueur, etc.) aim to make the same, only even better. First, the owners are interrogated - as best they could, but teach, show, lend. This is the first wave of moonshiners. After that, the study of the Internet begins in the hope of finding how to make a moonshine still with your own hands. This is the most inquisitive wave that is trying to figure out tons of information, what is true and what is a lie. We have already talked about how to make and assemble individual parts of the unit, now it's time to talk about how to assemble a complete device.
The history of the moonshine still
For the first time, they learned about moonshine back in the 4th century AD, when a Chinese alchemist compared the drink with clear wine distilled 9 times. Its technology was used at different times by the Greeks, Romans and even the Egyptians.

This is how, according to official documents, one of the first moonshine stills developed by the ancient Greeks looked like.
But if this unit was mostly made of stone, then the Arabs went further - and made the structure already from copper. This allowed the mash to warm up evenly, gradually, in full to remove fusel oils (remember, extremely harmful to health) and create a drink suitable for internal consumption.
The term alcohol was also proposed by the Arabs, in a literal translation, the word meant an intoxicating drink - al gogol.
In the 9th century, a serpentine was invented in Persia - they bend a copper tube into several turns, but still leave it in the air to cool.
Since the 10th century, at the suggestion of alchemists and healers, moonshine has literally flourished, combined with the development of recipes for potions and elixirs. At the same time, in Italy, the monk Valentius claims to have invented the water of life, which is capable of turning old people into young men. Do I need to say that it was moonshine?
In the 15th century, Basile Valentin came up with the idea of lowering the coil into cold water in order to increase the alcohol condensate, and this was the starting point for the creation of a modern apparatus with alembic, refrigerator and dryer.

This is what the device looked like in the 16th century (the principle of operation has been preserved to this day):
- Tub for heating tincture
- Tube for supplying hot tincture to the cube
- Stove
- Cap
- swan neck
- Coil
- Serpentine in the refrigerator
- Refrigerator with cold water
The first moonshine still in Russia
In Russia, moonshine was first tested only in the 17th century, when a unit was brought from Venice to Tsar Alexei Mikhailovich as a gift.
Until the 17th century from homemade alcoholic beverages in Russia they used only mead and mash. And only in the 19th century, with the help, they learned how to create 96% highly purified alcohol.
On this brief digression history is over, now it's time for modernity.
Buy or Collect
There is no single answer to this question. Of course, for a beginner, it is much more preferable to buy a ready-made device, when there is no need to look for individual details and bring them to perfection. But, on the one hand, such a purchase can cause a gap in the budget - good device with normal performance it will cost 15 thousand rubles or more, on the other hand, it is still more interesting to create and invent.
We will tell you how to make a moonshine still with your own hands, and from what materials.
To begin with, let's define what moonshine (distillate) is and how it differs from rectified. The principle of obtaining that one, that the other is absolutely identical. Sugar-containing (less often starch-based) mash is prepared, yeast is added, then for a certain time the mushrooms create a colony and secrete waste products. Actually, it is they who are the concentrate of various alcohols, of which only ethyl alcohol is suitable for ingestion.
Under the influence of temperature, the mash decomposes into a liquid residue and alcohol-containing vapors, which, during the distillation process, decompose into gaseous and liquid fractions.
Even in the case of repeated sweeping, it is not possible to purify the drink from all harmful impurities. The only way that allows you to get perfect pure product, is rectification using a tsarga or a distillation column. In this case, alcohol-containing vapors are divided into fractions in several stages. Do distillation column it’s not easy with your own hands, and a quite reasonable question arises - is it necessary to get pure alcohol in this way, if you can buy it at any pharmacy?
Rectified is extremely harmful to health precisely because of its purity, since pure poison is absorbed by the body much faster and better than moonshine with a certain amount of harmful impurities. In addition, all famous drinks - bourbon, rum, whiskey, calvados, scotch, etc. - are made on the basis of distillate.
So, taking into account the above characteristics of moonshine, it is clear that the main stage of production is to heat the alcohol-containing liquid to a state where alcohol begins to separate. After that, it is cooled until it is converted into a liquid fraction already in the form of a finished drink.
With this in mind, you can determine the main components of the moonshine still:
- distillation cube, where the mash is heated to the required temperature;
- refrigerator - a storage or flow tank with cold water, where the coil is cooled;
- coil - a spiral tube made of copper, stainless steel or glass, through which alcohol-containing vapor moves and is divided into fractions;
- sukhoparnik - trap of fusel oils and mash residues;
- acceptance tank - a place where chilled moonshine flows;
- connecting elements.
This is the first and main element of the moonshine still, on which the efficiency and final taste depend.
Most often, milk cans, pressure cookers (slow cookers), beer kegs are used as this. Less often, a distillation cube is made by hand from stainless steel or steel, welding them into a container, but this option is not reliable. On the one hand, the mash will stick to the stainless steel, and it will not be possible to stir it due to tightness. On the other hand, the slightest error in the welding seam can lead to the fact that when the mash boils, when the pressure reaches 180-220 Pa, the cube will simply burst.
How to make an alembic from a can

This is the simplest version of the alembic, as the can is relatively airtight, especially when it comes to a new container. But its "adaptation" for distillation has its own characteristics.
The rubber gasket on the lid of the can is categorically not suitable for heating - the mash will absorb a specific aroma that will not be slow to affect the taste of the finished drink. It is optimal to use silicone gaskets, and even better - aquarium silicone. Experts advise using food-grade silicone as such gaskets, from which baking molds are made. But in general, this option is suitable for sealing the lid and will not give any taste or smell.
How to make a silicone airtight gasket
.jpg)
This process is carried out in several stages, there should be at least three of them. First, apply aquarium silicone sealant to the edges of the lid, let it dry completely, apply a second and third, also leaving time to dry. After the third layer has been applied, put ordinary cellophane on the neck of the can and close the lid. Leave for a few hours for the silicone to dry completely. It turns out a really sealed vessel that can be used for several years.
To prevent the can from becoming like a colander over time, wash it thoroughly after each use. You can use ordinary or laundry soap and plenty of running water. Baking soda is strictly prohibited. Stainless steel or aluminum reacts very poorly to alkali.
If there is no desire to change the rubber gasket to silicone, you can simply wrap it with several layers of fum-tape overlap. This is also a fairly tight connection.
Some "experienced" moonshiners recommend using dough to seal the joint. It would seem, why not? It seems that the sealant is decent, and it smells like bread in the room, and not fusel oil in the cooking process. But! After the first volumetric distillation, when you have to start the unit several times, you will get tired of constantly scraping the dough and gluing a new one. Dough scraps all over the kitchen, broken nails and wasted time are unlikely to give pleasure from the process.
To connect the can to the serpentine on the lid, make a hole for a 22 mm pipe and a 12 mm serpentine using a 0.5 inch thread. You can buy an adapter at a plumbing supply store.
What else to look for when choosing a flask for a moonshine still:
- the material of manufacture is stainless steel, since aluminum will withstand a small number of cycles;
- the minimum volume is 25 liters to get 4-4.5 liters of moonshine at the output;
- wide mouth, which is convenient to work with - pour the mash and wash after cooking;
- wall thickness and overall build quality are directly dependent on price, and ensure normal operation.
Distiller (moonshine still) based on a milk can
How to make a distillation cube from a pressure cooker (slow cooker)
Scheme of a moonshine still based on a pressure cooker:

This is the minimum program for a beginner. Today, every second tries to make a moonshine with their own hands from a pressure cooker. And there is a perfectly logical explanation for this:
- price - the cost of the most inexpensive pressure cooker is 1500-1700 rubles, which is quite acceptable for any budget;
- tightness is an absolutely hermetic device that does not require any additional manipulations;
- ease of inserting fittings into the cover - everyone can handle it.
The minus, it should be noted, is much more significant than all the advantages - this is the volume. The bowl of the largest household pressure cooker is only 6 liters, respectively, only 4.5 liters of mash will fit, since the volume of the total amount should not exceed 2/3 parts. With this amount of mash after double distillation, you get a little less than 750 ml of moonshine. You can try, but it's unlikely to succeed.
In place of the valve on the cover, screw the fitting, to which you attach the connecting hose (silicone or copper).

If there is no desire to reinvent the wheel and look for a suitable option for making a cube, get it ready-made. The average price of such an element depends on the volume - 12-liter up to 4000 rubles, 25-liter - from 5500 rubles, etc.
.jpg)
Moonshine from a pressure cooker with a steamer on video:
Fridge
An equally important element of a home-made moonshine still, on which the speed of distillation and the volume of the finished drink depend.
If the water in the refrigerator is not cold enough, the volume of moonshine is reduced by 15-20%.
Refrigerators for moonshine are divided into 2 types:
- flowing;
- cumulative.
In flowing water, as the name implies, it constantly moves through the coil without having time to heat up. In order to make such a unit, it is enough to bring two hoses to the tank - incoming, as a rule, from the tap, and outgoing - from where the water comes out into the sink.
The accumulative is a closed container where water is first poured and drained as it heats up. This is the worst option for a refrigerator, as it does not allow the coil to be fully and constantly cooled, thereby reducing condensation and reducing the amount of the final product.
A storage refrigerator is installed only if it is not possible to make a flow-through one. There is no opportunity, not laziness or no time.

This type of equipment is quite compact in size, where the main area is occupied by the coil. The refrigerator itself is closed on both sides, but two tubes are connected to it - receiving and discharging water. Making a refrigerator with your own hands is not difficult, but at the same time it is necessary to ensure that it is even in relation to the apparatus so that the water moves constantly.
.jpg)
A flow-through refrigerator is more productive, in contrast to a storage one, even with a smaller coil. At the junction of the two media, the tube is instantly cooled, which ensures a faster separation of the fractions.
Manufacturing process
.jpg)
You will need:
- pipe and adapter weaving - 300 mm;
- 2 meters of bellows hose for the coil;
- half-inch nipples;
- 3 half-inch nuts;
- soldering iron;
- pistol and silicone;
Procedure:
- Coil the bellows hose

- Make holes in the pipe and cut off the plastic with a knife


- Screw in the nipple

- Install gaskets and tighten nuts

- Screw the coil to the plug


- This is what the entrance and exit looks like

- All that fonite and see through, fill with sealant, the vessel must be completely sealed.


As such a device, a bucket or tank with a volume of about 20-30 liters is usually used, where a hole is made in the lower segment for a set of water.
In non-flowing devices, water is always drained from above, and it is always poured into the refrigerator from below.
The simplest and most affordable is a regular plastic bucket. In winter, with such an improvised device, it is easier, since you can put snow or ice, which is much better for cooling the coil than water.
When choosing a storage refrigerator, try to keep the temperature in the distillation cube at a minimum heat in order to reduce the amount of alcohol-containing steam released and, as a result, increase the volume of finished moonshine.
In order to check how efficiently the coil is cooling, periodically test the outgoing moonshine on your wrist. Ideally, it should be cool, worse - if warm, and it’s really bad when the drink is hot - in this case, a third of the steam comes out unprocessed. In addition, it is also dangerous, since the alembic heats up to open fire, alcohol can catalyze and there will be a big trouble.
Coil
The best material for the coil will be copper. This is a relatively inert material that does not react with alcohol materials, has good thermal conductivity and an adequate price.
Those who are really professionally engaged in the preparation of moonshine have only a copper moonshine still based on such a coil. Any experiments. Including with fragile glass, they are fraught with a loss in the quality of the drink and the feedstock.
How to make a serpentine
Before proceeding to the description, we note that the coil is a tube connected to a distillation cube (if there is a steamer, with it) and placed in cold water, through which alcohol-containing vapors move and fractions are separated into gas and moonshine.
The longer the coil and the more compact its spirals, the more the steam is cooled and the greater the amount of condensate.
You will need:
- copper tube with a diameter of 15-20 mm, length 2000mm;
- base for winding the tube, fixed in a vice.
Before you start winding the tube onto the base, it must be filled with sand. This is done in order to exclude deflection or one-sided deformation, which will later retain condensate. On one side, close the tube with a wooden or cardboard chopstick, pour sand in a thin stream, periodically tapping it on the table so that the sand is well compacted. When the tube is packed to capacity, close the other end with a similar chopstick and start winding it onto the base, making even turns and trying not to touch each other.
.jpg)
This is how a ready-made coil looks like, which is immersed in a refrigerator and connected with hoses through fittings to a cube or dry steamer.

This completes the assembly of the mandatory elements of the moonshine, it remains only to find out which hoses can be used and what materials are acceptable when working with alcohol.
In the meantime, let's focus on such an optional, but extremely useful device as
Sukhoparnik
.jpg)
Whether there were discussions about the need for a dry steamer in those ancient times, about which it was written at the beginning of the article, we do not know. But now there is a fierce debate on this issue. Some insist that fusel oils should be removed as much as possible, others claim that they are useless and a waste of time.
Without actively taking either one or the other position, we will present only bare facts.
The steamer is really not an integral part of the moonshine still, and it is installed as desired. Structurally, this capacity is 10 times smaller than the distillation cube, which is located between it and the coil.
The main task of a dry steamer is to instantly reduce pressure and, as a result, temperature due to different media. When it enters this container, the vapor abruptly becomes liquid, but it is immediately pushed out by the next portion of hot alcohol-containing vapor from the cube. And although this is only a moment, during this time some of the fusel oils have time to settle on the walls of the steamer. With double or even triple distillation, the fuselage practically does not remain in the finished drink, which has a very positive effect on well-being.
How a dry steamer works according to the laws of physics
At a time when water boils in a distillation cube, alcohol begins to stand out and evaporate. Taking into account the fact that boiling is a rather rapid process, the alcohol fractions have time to “pick up” the heavier fractions of fusel oils. Probably, everyone has heard that moonshine is often called fusel oil - precisely because of the characteristic smell that fusel oils emit. The less fuselage in moonshine, the less aggressive its aroma and more acceptable taste. It will not be possible to completely get rid of oils, this can only be obtained using a distillation column, but no one set out to get medical alcohol as their goal.
The vast majority of alcoholic drinks are bourbon, whiskey, rum, calvados, etc. made on the basis of moonshine with a certain amount of fusel oils. The production process varies in nuances, but in general, this is the most banal distillation of mash.
Capturing fusel oils with a steamer makes it possible to make the drink, on the one hand, not so fragrant and fragrant, on the other hand, safer for health with an almost imperceptible feeling of a hangover (with reasonable use).
It is especially common to use three dry steamers at once, located relative to each other in a cascade. With such an organization, the strength of the drink reaches 80% already on the first stage. It will be a really very high-quality and maximally purified product that can be consumed immediately after distillation, and not wait until it is cleaned with a carbon filter or potassium permanganate.
Three banks in a cascade is the optimal number. Less is not enough, more is a waste of time, because after the third can each subsequent one does not perform any function.
How to make a steamer from a can
We remind you that the volume of the container should be 10 times less than the volume of the distillation cube. If you have a cube of 20 liters, take a 2-liter jar, for 30 - respectively, a 3-liter jar.
The method of preparation of such an element is quite simple and suitable for any volume. All manipulations are carried out with a lid - holes are made and fittings are cut. Further, the lid can be put on any jar with a threaded neck.

You will need:
- screw cap from the jar;
- 2 fittings;
- connecting tubes.
You cut 2 holes in the lid - they can be made with a screwdriver in a circle or with a knife, then so that there are no burrs.
Insert fittings and connect with hoses.
.jpg)
Sukhoparnik is placed immediately after the distillation cube. It's useless anywhere else. It is necessary to periodically drain the accumulated liquid so that its excess does not fall into the coil and does not spoil the taste and aroma of the product.
By the way, a steamer can be used not only as a trap for fusel oils, but also as a moonshine flavor. Here, the same process of abrupt cooling of the steam and its movement further takes place, but with the collected amber of berries or herbs.
As an aromatic component in a jar, you can use:
- dried fruits - apples, pears, apricots;
- berries - any, preferably dried, they give off more smell;
- spices - any to taste, you can hop, suneli, cinnamon, vanilla, etc .;
- fragrant herbs;
- citrus fruits - orange peel, lemon peel.
Since such an aroma binding will be subtle and not tasted at all, you can try the most various additives. In this case, experiments will only benefit, even if the result is not impressive.
Connecting tubes
The finished moonshine is a detachable connection of all the required elements using threaded connections. No need to look for additional tubes and choose their quality in order to connect everything together.

There are completely one-piece connections, for example, the lids of the distillation cube, the steamer and the refrigerator. This is done to facilitate labor and installation.
You can, of course, make it easier to assemble a home-made moonshine by connecting all three pipes by welding, but this will not affect the taste of the final product, but care can make it very difficult.
The most optimal way to connect the elements is a silicone hose. Some do not understand the difference between PVC and silicone and do not even pay much attention when choosing. We explain - polyvinyl chloride is a non-inert material with respect to alcohol. Upon contact with hot alcohol-containing steam and alcohol, PVC releases toxic substances, which in high concentrations are harmful to humans. It is clear that nothing will happen to you in 1-2 times, but if we are talking about systemic use, it is better to refuse such a connection.
How to distinguish silicone from polyvinyl chloride (PVC)
Set fire to a piece of both material. PVC burns heavily, smoky, with a very specific smell. Silicone burns with a barely perceptible aroma, does not smoke, light ash remains after combustion.
To the touch, silicone is much more pleasant than PVC, it is as if silky.
If you suddenly find yourself in a dilemma - silicone or pvc - on the street in the cold, know that silicone remains flexible and elastic even at -10, and polyvinyl chloride hardens, although it does not lose its properties.
Which metal is suitable for use
Despite the abundance of opinions on this matter, there can be only one unequivocal answer - food grade stainless steel. It is this material that does not react with any of the elements in the moonshine brewing chain, it is easy to maintain and operate. And for all the time it does not form deposits of little use to health.
It was previously believed that copper was “the head of everything,” since copper moonshine was ubiquitous. However, this is misleading. Copper began to be actively used in Soviet times. Since it was affordable both in terms of price and quantity of material. If we talk about a really correct tincture, then it is better oak barrel find nothing. Oxygen seeps through its walls, aldehydes and ethers evaporate, which, by the way, are formed, among other things, upon contact with the hot vapor of alcohol of the copper elements of the apparatus.
Aluminum reacts negatively to vinegar, which is always present in home brew. In this case, toxic salts - alum - are released.
Glass is also considered optimal, which is inert (not active) to aggressive environments, but the moonshiner's kitchen does not look like a laboratory, and this material is very fragile.
Of course, it is possible to get poisoned or die from general intoxication with the abuse of alcohol or the acquisition of low-quality products than from copper oxide. Moreover, as a coil, copper has no analogues at all in terms of thermal conductivity and manufacturability. Therefore, the combined combination of materials is fully justified. It can be a stainless food steel cube or an aluminum can, and a refrigerator with a copper coil in a stainless or plastic case.
And finally, a video on how to make a moonshine with your own hands