 Entrance
Filling dough for bread. Air jellied bread in the oven! Filled bread in a bread maker
Airy, light, weightless like a cloud of white bread under a ruddy creamy crust. Very tasty! With milk or tea, with the first course or with vegetable salad- good in any case. The recipe is simple, even a novice cook can cope with it without problems. Try it!
Would need:
Wheat flour / Flour (280-300 g) - 300 g
Milk - 100 ml
Water - 100 ml
Salt - 1/2 tsp
Sugar - 1 tbsp. l.
Corn oil - 2 tbsp. l.
Yeast (without a slide, dry fast) - 1 tsp.
Chicken egg - 1 pc.
Yogurt - 100 ml
How to cook:
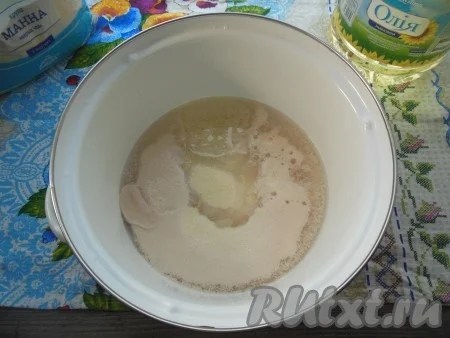
Mix the sifted flour with yeast, salt and sugar. Pour milk, water and corn (sunflower) oil into the dry ingredients.
Since flour can be different (with greater or lesser moisture content, density), it is not worth pouring all of its quantity into the dough at once. You may have to slightly adjust the proportions of the dough, put a little less or more flour.

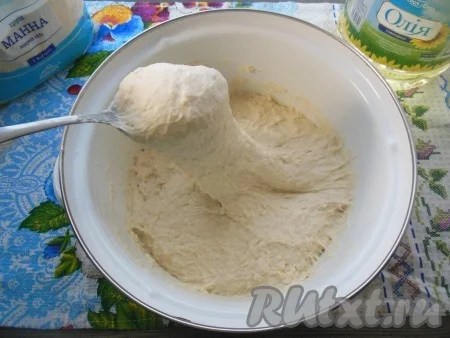
Knead the dough. The dough is soft, tender, but quite dense. It keeps its shape well and does not stick to the hands and the work surface. Knead the dough for 8-10 minutes.
Put the dough in a suitable container, greased with rast. oil, tighten cling film and put in heat for 40-45 minutes.

Place the risen dough on a lightly greased work surface. oil, punch down and cut into several (10-12) approximately equal parts. (only cut, do not need to shape the dough, round, form balls)

Put the resulting blanks in a baking dish (d 20 cm) at a small distance from each other. If you use a split form, then its bottom must be lined with two layers of parchment. Grease the bottom and sides of the form. oil. If the bread is prepared in a whole form, then you do not need information about parchment.
Put the form with bread in heat for 20 minutes, covering with a napkin or towel.

Mix yogurt and egg until smooth with a whisk. You can add a pinch of dried herbs if you like. Replace yogurt with low-fat sour cream or thick kefir.

Pour the risen bread evenly with a mixture of yogurt and eggs. (this is exactly what parchment is for - it will not allow the fill to "escape" from the form)

Bake bread in an oven preheated to 180 ° for 22-25 minutes until golden brown. (always take into account the peculiarities of your technique) To prevent the bread from browning too much, cover the bread with food foil 7-10 minutes before the end of baking.

Remove the bread from the mold, place on a wire rack and cool.
All is ready!

Enjoy your meal.


In my family, in which I was born and raised, bread is not bought in the store, my mother bakes it herself. I try to keep this tradition, but with all my desire it does not always work out. But when the opportunity arises, I take it. Every time I try to experiment and cook bread according to different recipes.
Prepare necessary ingredients for making sourdough bread.

AT warm water add sugar and yeast.

Mix and leave for 10 minutes for the yeast to start working. A foam cap should appear.

Add salt and sifted flour.

Use a spatula or spoon to knead the dough.

The dough should be homogeneous and sticky, in consistency - like thick sour cream.

Cover the bowl with a towel and leave in a warm place for 30 minutes. During this time, it should approach and increase in volume.

Mix the dough and leave for another 30 minutes. In this way, we saturate the dough with oxygen, and as a result we will get soft and porous bread.

Line a baking dish with parchment paper and pour in the batter.

Let it stand warm for another 10 minutes.

Send to the oven preheated to 200 degrees for 35-40 minutes. Bake aspic bread until a beautiful ruddy color.

Delicious, fragrant bread is ready. Remove it from the mold and cool on a wire rack so that it does not get wet.

jellied bread has a thin crispy crust and a porous crumb.

Enjoy your meal!

I offer one of the most simple recipes cooking homemade bread. Bulk (it is also called "jellied") bread is soft, fragrant and very tasty. According to this recipe, even a beginner can cook it. Just a couple of hours and a fragrant, delicious bread will lie on your table. This soft bread, with a delicate crumb and an appetizing crust, holds its shape well, easily recovering when pressed. Even after two or three days, it will still remain soft. No store-bought bread compares to homemade bread. Bulk bread can be baked lean, kneading it in water, or whey can be used instead of water. Bake bread according to this recipe and you will definitely be satisfied with the result!
Ingredients
To make bulk bread you will need:
warm water (or warm whey) - 500 ml;
dry yeast - 2 tsp;
sugar - 2 tsp;
salt - 1-2 tsp;
semolina - 2 tbsp. l. (in the dough) + 1-2 tbsp. l. (for sprinkling molds and bread);
vegetable oil - 2 tbsp. l.;
flour - 4 cups.
A glass of 250 ml.
Cooking steps
Leave for 5 minutes (until a yeast cap appears).
 Then add to the mixture semolina, vegetable oil, salt.
 Pour in the sifted flour here.
 Use a spoon or your hands to knead the dough. The dough is not very thick, but not too liquid (as in the photo).
 Cover the dish with the dough with a towel and leave in a warm place to rise for 1.5-2 hours.
 The photo shows how the dough will look after 30-40 minutes.
 Punch down the dough with your hand or a spoon and cover again with a towel.
 After a while, punch down the risen dough again. In 1.5-2 hours, the dough, which we kneaded twice, will rise perfectly.
 Grease a baking dish (I baked in a 26 cm diameter form) with vegetable oil, sprinkle the bottom with semolina.
 Transfer the dough into a mold, sprinkle the top of the dough with a thin layer of semolina. I greased my hands with vegetable oil and gave the product a round shape.
 Let the dough rise in shape for 30 minutes.
 Bake in a preheated oven at 170-180 degrees for 35-40 minutes. Ready appetizing, delicious bulk bread remove from mold, cool on wire rack. Baking bread is not difficult at all, you will definitely succeed!
 Tasty and pleasant moments!
The electrician's son comes home with a swollen cheek.
- What happened? the father asks
- Yes, one end of the wasp turned out to be uninsulated.
Filled bread in a bread machine. Recipe step by step.
Hello!
I don’t know how it is in your cities, but in ours, aspic bread has recently begun to be sold. It has a rather original structure. It is a bit rubbery, porous and somewhat reminiscent of a biscuit, but still it is bread. In general, those who have never tried bread will not leave indifferent. It's not certain that you'll like it (although most do), but its structure is unlike anything else and will resonate in your soul anyway. After a long search for the recipe on the Internet, I found only one and a bunch of copies on other sites. As a result, we managed to agree on “cooperation” with a familiar technologist. I won’t give the classic recipe, because it’s a trade secret 🙂 And if in fact, I haven’t tried it, and since aspic bread is “difficult”, I won’t rush to post the “raw” recipe. Especially when you consider that in order to get my recipe, I had to feed about 10 buns to the dogs, until I understood how you can make aspic bread at home using a bread machine.
I’ll tell you right away what I use for my “measurements”. All photos are clickable (enlarge when clicked). And also, all the photos were taken on the same day by me personally and are 100% real. A photo ready bread in the context you can see on the thumbnail of the article, and all intermediate results are below.

Jellied bread in a bread machine - recipe and technology.
Actually, ordinary household (non-programmable) bread machines will not allow you to cook jellied bread in automatic mode. Further I will tell the technology and you will understand why.
Jellied bread in a bread machine - ingredients
- Flour - 450 gr.
- Water - 450 ml.
- Yeast - 3 tsp (15 ml). If the dough rises too quickly, the amount of yeast can be reduced and vice versa. (Depending on the “age”, I use 2 tsp if the yeast is young, or 3 tsp if the yeast has been open for a long time and has lost its activity.
- Sugar - 1 tbsp with a slide (15-20 ml)
- Salt (large) - 1 tsp with a small slide (7 ml). You can slightly increase the salt, for those who like it saltier, but no more than one and a half teaspoons.
 Take a bowl of suitable size for the dough (1.5 - 2 liters in volume), pour all the water into it at once, preheated to 38 ° C (I don’t use thermometers, just warm water), add sugar, yeast, 100 grams flour and stir it all up. It is not necessary to strive for complete stirring of the lumps, but also not to slouch. It should turn out as in the photo.
Now do not relax and do not remove the dough far, the main thing is that it is not too cold and the dough does not cool down much. And you, meanwhile, measure out another 350 grams of flour and put salt in the flour. After about 5-7 minutes, very small bubbles will begin to appear on the dough, like foam. Stir the dough for about a minute and you will see a picture like in the next photo.
Now pour the flour into the dough and start kneading with a spatula until you get homogeneous mass(it takes about 10 minutes, but it is better to knead for 15 minutes - it makes no sense longer and can even be harmful). You have to mix with a spatula. At the end of the article, I will answer this “question”. The dough will not be thick and not liquid, something in between. If you make it a little thicker, then it will be difficult to interfere, and if it is thinner, then it is very easy to miss the moment when it needs to be baked and it may sink and you won’t be able to make it as filler (I will also talk about this a little later). The video above clearly shows the consistency. In general, if you see that the dough turns out to be liquid, add 15-25 grams of flour, if thick, then the same amount of water. Even if you think you've mixed well, don't stop and stir as much as you can, up to 15 minutes. During this time, gluten does not have time to swell and does not have time to form fibers, and a more thorough kneading will better saturate the flour with water.
 Now you take a mold, grease it with vegetable oil or animal fat (whichever you prefer) and “pour” your dough into it. Well… it’s like pouring and shifting 🙂 I have a form 15 cm high and the dough in it took exactly 5 cm.
 Then I placed the form in the bread machine (yes, by the way, I took the knife out of the form, it is removable and I cooked bread without it). I choose the regular program white bread(not accelerated). The bread maker starts
  equalize the temperature before kneading, but does not start kneading anything yet. It happened to me after 25 minutes - the dough rises twice. If the flour is normal and you did everything right, then you will have a similar result.
 You can clearly see how the dough has risen in the photo. By the way, here I slightly “overexposed” it. If you see that air bubbles began to appear on the surface, as in the photo, as if looking through the top, then you either overexposed it or mixed it poorly and don’t wait any longer, immediately put it on baking. You don't need to knead the dough. Thoroughly mixed - poured into a mold - allowed to rise and put on baking. I put on 55 minutes. 15 minutes before the end of baking, open the lid with a spoonful of oil and a brush at the ready and grease the top. The operation takes about 10 seconds. I close the lid and continue baking. For those who will bake in the oven, then the temperature is about 200-220 degrees (depending on the shape and thickness of the dough in the form). If the thickness is small, then 200 degrees is enough and baking for about 30-35 minutes. If you bake in a form in which the dough rises like mine by 10 cm or more, then the temperature should be kept at 220 for the first 20 minutes, then reduced to 200 and bake until cooked (about 30-35 minutes)
 When the bread is baked, I leave it for five minutes in the bread machine. After five minutes, I shake out the bread on a thick cotton towel and send the bread to stand for a while. Due to the fact that the bread is aspic and rather “wet”, it takes time (about 2 hours) to fully “come to its senses” and be ready to eat, and preferably four hours, but you are unlikely to wait for this moment 🙂
The bread “spent” about an hour and a half in a towel and can be cut. In the video, you can hear how the crust crunches, but at the same time the bread almost does not crumble, it is quite elastic and very tasty.
And now I will tell you a few nuances that you may encounter.
Mistake #1. In the recipe from the Internet, it is recommended to let the dough rise, then knead and then rise again and bake. This is not necessary, and in the classic recipe (in the store) this is also not done. The reason is simple. Bread rests solely on gluten, which is very rare in batter, i.e., literally, on parole, so it’s better not to disturb him once again.
Mistake #2. Not strong enough and not long enough. It is necessary to knead not quickly and not slowly. The task is to thoroughly stir the dough in 15 minutes and leave it. If under-mixing occurs, the gluten will not mix and swell poorly; if over-mixing occurs, you break the gluten bond and in both cases the bread will not rise well or fall off. Based on what I have already said, if you do a hug, then there will be no more airiness, and it is already low. Basically, this is the main reason for the “difficulty” of such a test - it is either done once, or flour is added until the right amount and make regular bread.
Mistake #3. Mix with a bread maker. From the previous advice, you can guess that you can knead with a bread machine literally for the first five minutes, then gluten fibers begin to form and the bread machine simply tears them and this again leads to friability of the dough structure. Therefore, kneading must be done by hand with a wooden, plastic or silicone spatula.
Mistake #4. If you bake in the oven or when you look into the bread machine, do not slam the door and in general be careful with the risen dough. It is somewhat similar to a biscuit - a careless movement and everything was blown away. And the thinner the dough, the more carefully you need to handle it.
Mistake #5. Knead in a circle (not mixed middle) - in the middle remains a large number of bubbles and yeast, which work most actively and as a result, the uneven work of the yeast leads to the appearance of a bubble in the center under the top crust and, as a result, the failure of the crust. The failure can also be from overexposure, and it is possible that you cannot get rid of it without panifarin.
A little trick.
There is such an additive panifarin. This is gluten. Its use will significantly improve the structure of the bread and it will turn out more airy. If in my version (without panifarin) water and flour are in equal proportions, then when using panifarin, you need to add 50 ml more water. It is possible that not even 50, but 100 ml, but I can say more precisely when I try it myself. One thing I can say for sure is that with panifarin, the dough starts up much thinner. There is also an additive irexol, but I see no reason to use it at home (it is also included in classic recipe jellied bread). Ireksol is a bread bleach and slows down staleness.
What happens if you let the dough sit? Add acidity. During fermentation, bacteria release carbon dioxide, which in water turns into carbon dioxide, and therefore formed sour taste bread on dough (plus various waste products of bacteria). Well, plus the bacteria will gain strength and be very active. So it will be necessary to keep an eye on both and work ahead of the curve. If in my method the yeast just woke up and raised the dough in half an hour, then when they are active and full of strength, the count goes on for tens of seconds (it will be easier with panifarin). Well, if you want to get fragrant aspic bread, then the longer the dough is (up to 18 hours), the more fragrant the bread will be, but another point must be taken into account - the longer the dough costs, the less sugar remains in the dough, therefore, in addition to salt in the batch you will need to add sugar, otherwise the crust will not bake and will be pale. In a completely fermented dough, there is no sugar left at all. And by the way, alcohol also has a positive effect on the quality of bread. Therefore, a long-term sourdough will have a different taste variant. Maybe I'll give it a try sometime and post the result.
The dosage of yeast is selected empirically. If you put less, then the bread will rise for a long time, if you put more, then the taste of yeast will appear. Reduce the amount of yeast a little each time until the dough rises within 30 minutes. Firstly, it will be more convenient for you to note the time, secondly, stability will appear, and thirdly, it will be the optimal amount of yeast.
Salt is better to put according to the recipe. More can stop fermentation, less can result in undersalting.
Get yourself a sheet for jellied bread. Divide it into columns: flour, water, yeast, sugar, salt and experiment with yeast, flour and water, with the duration of the dough, etc. And then in a separate notebook, describe each recipe. I give you a working recipe that can be changed within small limits and observe the result. In any case, you don’t have to look for someone to feed 10 loaves of bread 🙂
Conclusion
It is almost impossible to cook jellied bread with a conventional bread machine in automatic mode. The dough is very "difficult" for the automatic mode. It is difficult to predict its behavior due to critical proportions (a large amount of water and yeast in relation to flour). A lot has to be done by eye (including determining the structure and consistency). You can’t knead with a bread machine, because it is “used” to work with relatively steep (in comparison with aspic) dough and does not take into account a small amount of gluten. In the process of preparing the dough, the bread machine produces several punches, which is detrimental to the jellied dough. Flour changes its humidity every time (because the humidity in the room is constantly changing), and because of the critical proportions, this greatly affects the final result (since even a teaspoon of water plays a significant role). Therefore, there is only one option left - to prepare the dough manually, and then bake it in a bread machine in a semi-automatic mode.
If you want to bake in the oven, then you don’t need to look for some special form, you can bake in an enamel pan of the desired diameter.
If I manage to find panifarin, then of course I will try with it and tell you the results. I'm sure what will be better, but the recipe will have to be tweaked and my dogs and cats will eat bread again 🙂
P.S.: Who did it - photos and reviews in the studio, that is, in the comments to the article.
Post navigation
Filled bread in a bread machine. Recipe step by step.: 4 comments
- Julia
Excellent bread!!! Already baked my second loaf. Thanks to step by step recipe It was clear what to do and how to do it. It turned out the first time, but on repeat, I took into account all the mistakes and those moments that I misunderstood at the debut. An excellent result is evident. Relatives approved, crack and praise.
Big thanks!!! There was no doubt that the recipe was worth a try. Sorry I don't know how to attach a photo. - Lika
- Hereditary master Denis Post Author
Lika, hello. Sorry for the long answer, but the boarding time has begun and not yet to the site. I saw your post right away. Thank you so much for a no less detailed answer, which is almost like a full-fledged article.
Let me give a few comments on your comment - express the thoughts that have arisen looking at your photos.
It occurred to me that in a bread machine the top of the bread simply has to fall through - because even in your form it falls slightly (and the shop one too), and in the form of a bread machine the distance between the side walls (long) is about 1.5-2 times greater. It turns out that you can’t get rid of the failure in the middle when using a bread machine.
As for the salt - indeed, the bread is super-salty. According to my calculations, the norm of salt per 1 kg is a teaspoon with a slide (for bread 500 g of flour and 350 ml of water, I put a measuring spoon without a slide (5 ml) of salt). And there are three times more.
You touched on the topic of protein in flour ... It's great that you know this topic, but if you also write about the study of flour, it will be very strong 🙂 But you are right on one thing, you need to know as much as possible about flour to make jellied bread.
Regarding sourdough or yeast, this is a personal matter for everyone. Despite the large number of articles about some kind of thermophilic yeast (which I don’t believe in), I have more worries about various additives already in flour (the other day I took a small bag of flour, it’s kind of yellow, and bread is straight from it super-airy, obviously with additives already coming). Moreover, I always pour the yeast down (salt, sugar, etc.), then the flour through a sieve mug, then carefully pour water onto the spoon (without blurring the flour), so this time the flour floated up in a whole lump as soon as I poured water. So for the time being, you will first have to pour water, sow flour, and lay out all the other ingredients on it. Well, again, some people like the yeasty taste, but some do not. Therefore, you need a yeasty taste - you need to let the dough brew or use sourdough, you don’t need it - bake it right away. Sourdough was used in the old days when it was not possible to buy yeast. Use all your a good idea, but then it is necessary to completely switch to subsistence farming and give up personal time as such. I am a supporter of the combined approach. Yeast is yeast. Dry or wet, it doesn't matter. It is necessary to make a dough - I diluted the yeast and let it brew for the right time. As I said, I am more worried about flour than products that cannot contain additives - I prefer to buy such products, rather than bother myself. But that's my personal opinion.Despite a significant increase in cooking time
Few people like to cook for 10-12 hours or all day. After all, if you put it in the refrigerator in the evening, then in 10-12 hours it will be morning and you have to run to work, and not cook bread or indulge in it only on weekends or put it in the refrigerator in the morning and do it in the evening - in any case, this is a chore, for which not everyone is capable of and it’s not at all about the taste of yeast. I tried to optimize the process for fast food because bread is already “difficult”. I would like to see the process with my own eyes in the store, but I still don’t know how to do it, then I would know exactly what consistency the dough should be and “adjust” a more accurate water-flour ratio.
Regarding gluten - yes, there is such an option, again for those who like to occupy their hands, who have free time or who do not have the opportunity to buy panifarin. And so, in my opinion, it is easier to buy (it is not so expensive).
Once again I want to thank you very much for your detailed comment. I would like to note that the bread in the photographs is indistinguishable from the store (if not for your detailed story, I would doubt that you baked the bread, and did not buy it).
- Hereditary master Denis Post Author